
This article describes how to repackage complex online EXE installations into MSI package using PACE Suite - MSI Generator on the example of Mathworks MathLab R2017a.
Due to high amount of resources to be captured, we recommend such hardware specifications for the packaging environment in such cases:

You can find general information about repackaging scenarios in section 3.1 of the PACE Suite Getting Started document.
Review the educational video on how to convert EXE to MSI.
Step-by-step instruction of converting EXE to MSI using the Snapshotting capturing method:
- Download and extract the MathLab installation to the local folder.
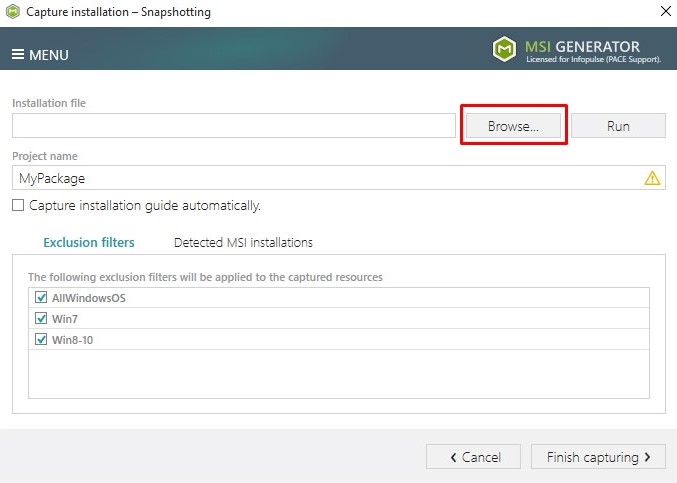
- Launch MSI Generator.
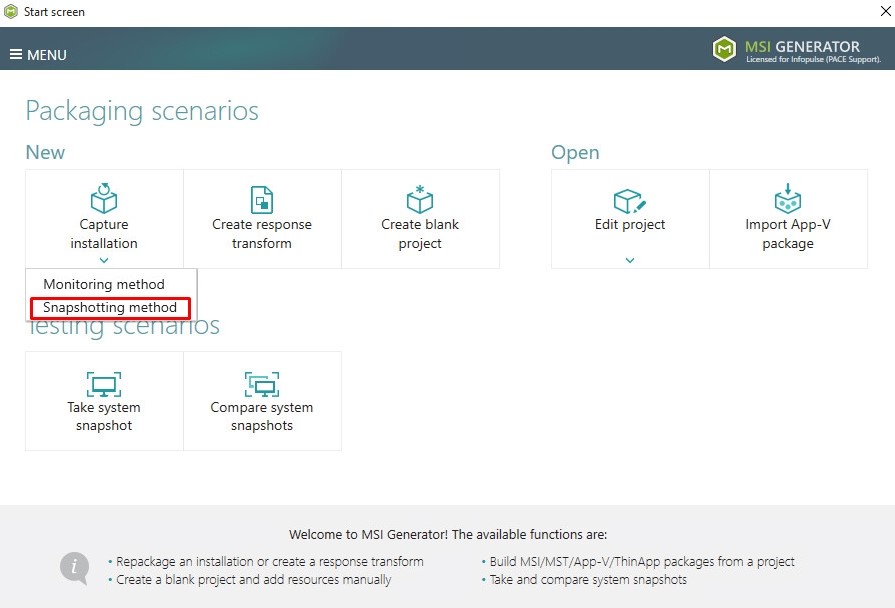
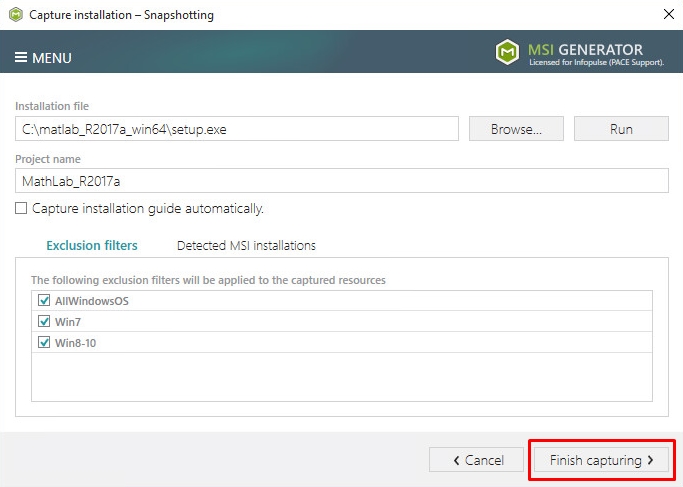
- Click Capture installation and select the Snapshotting method.
- Please wait while the initial system snapshot is taking.
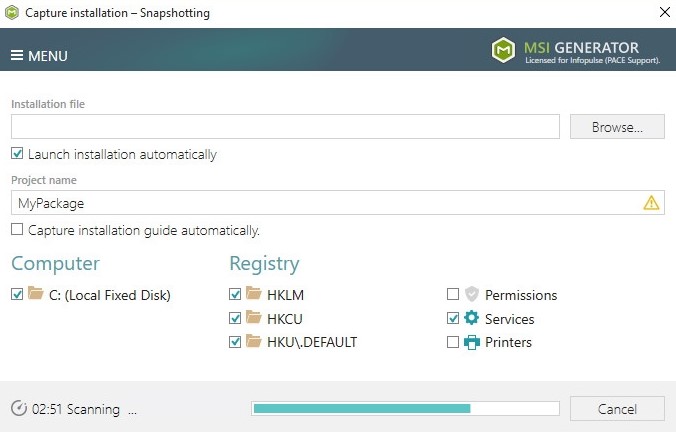
- As soon as the initial system snapshot is taken, click Browse… to choose your source installation file for repackaging.
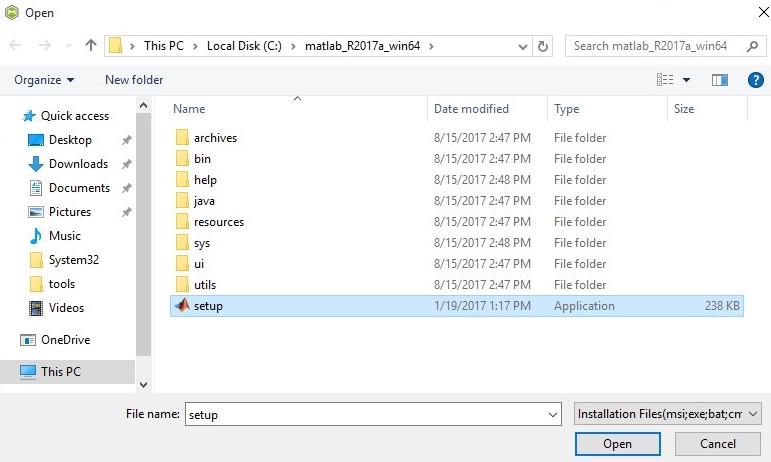
- Choose the 'setup.exe' file of the MathLab installation and click Open.
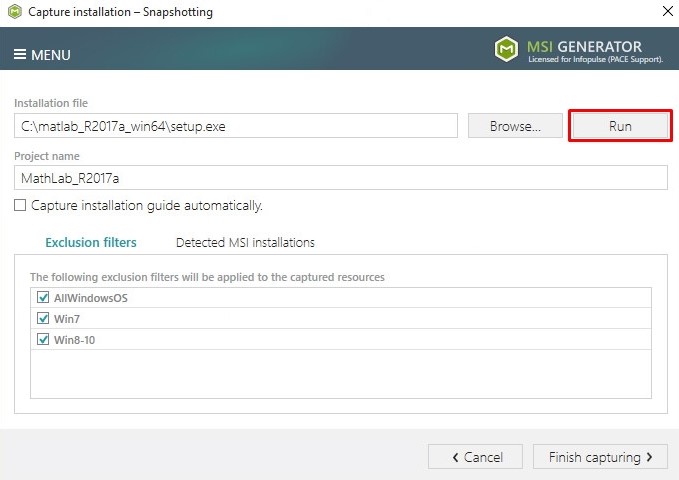
- Click Run to launch the selected setup.exe installation file.
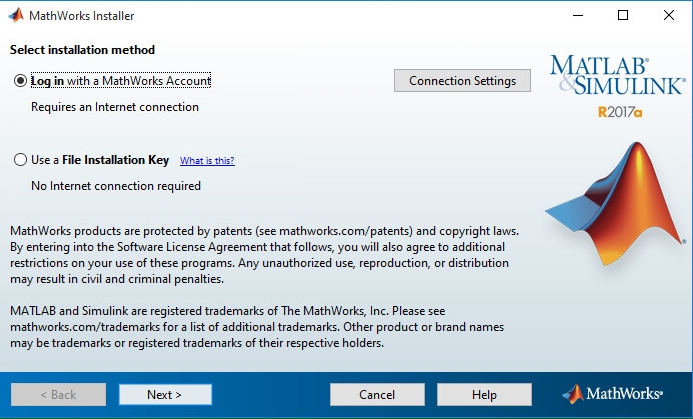
- Select the required installation method and click Next >.
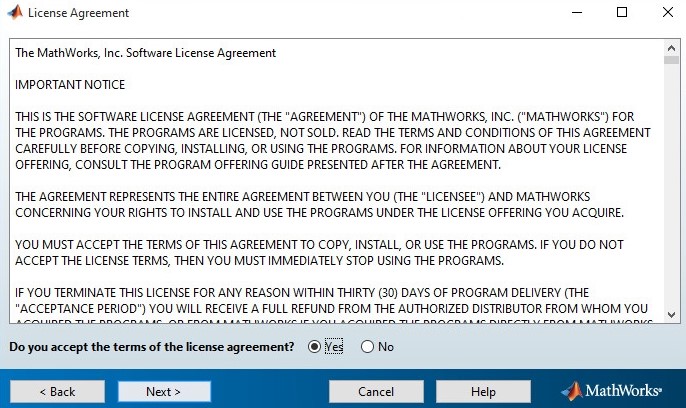
- Accept the license and click Next >.
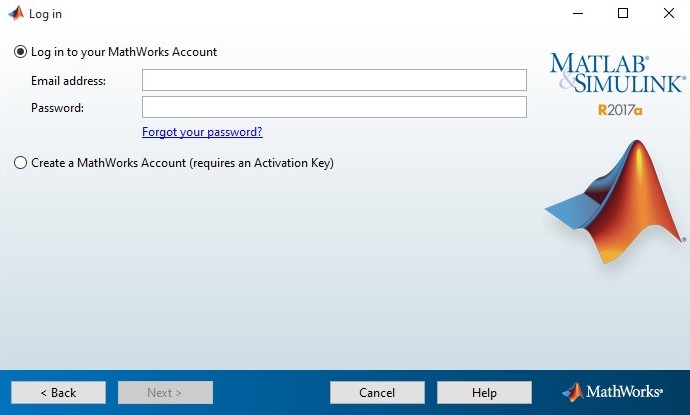
- Enter credentials to your MathLab account click Next >.
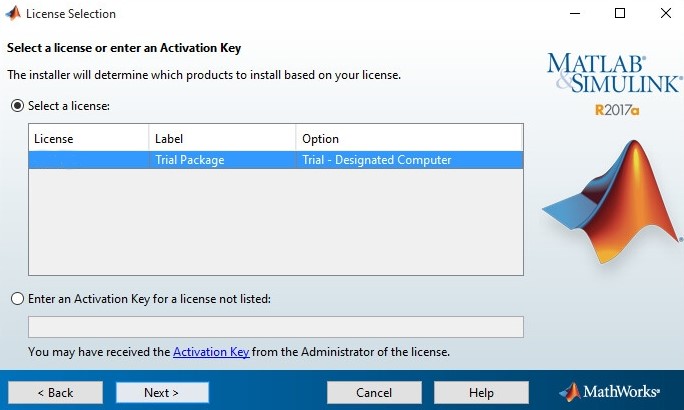
- Select a license from the list and click Next >.
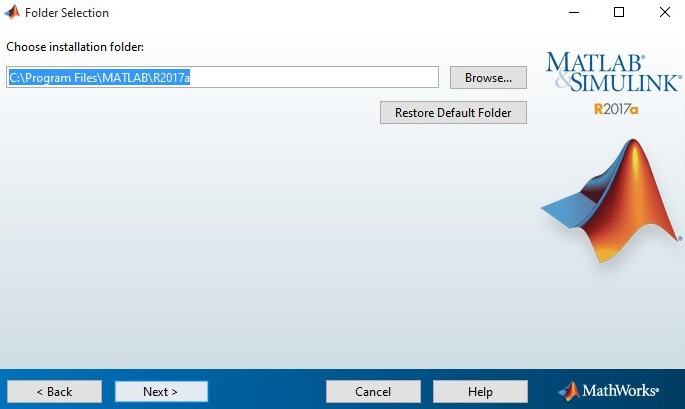
- If needed, change the MathLab installation folder and click Next >.
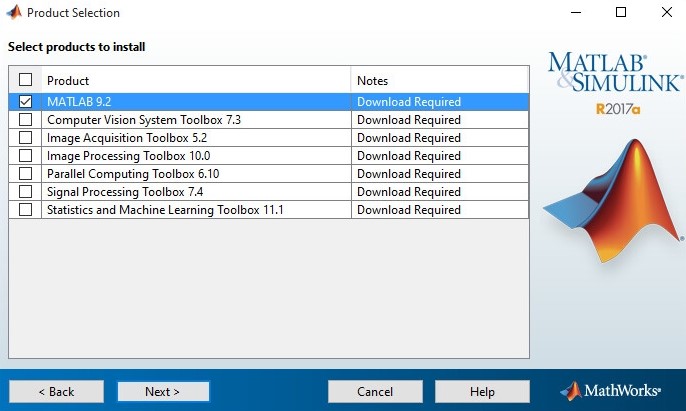
- Select the required MathLab components to install and click Next >.
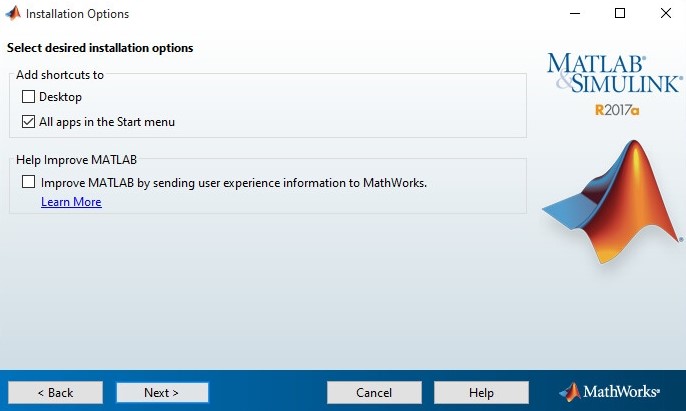
- Select the necessary options and click Next >.
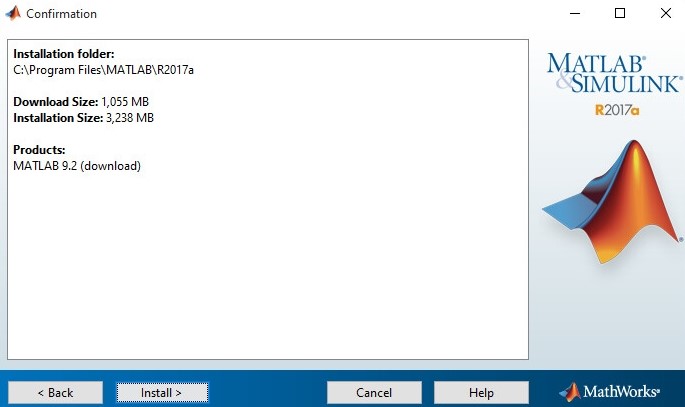
- Click Install >.
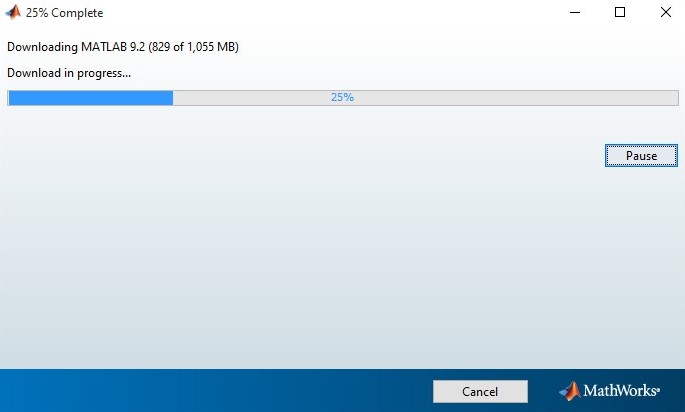
- Wait while the MathLab installer is downloading and installing its components.
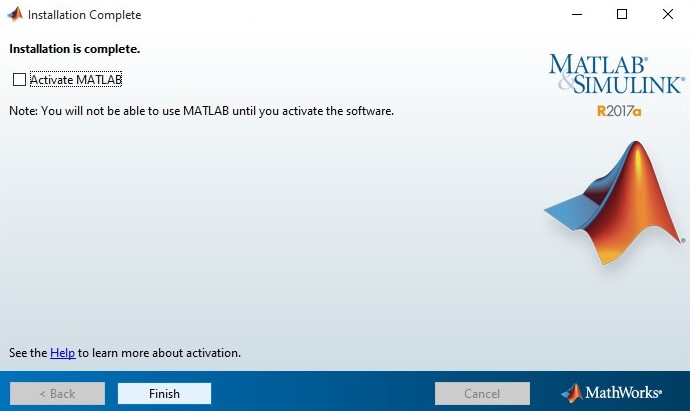
- Deselect the Activate MATHLAB option and click Finish.
- Go back to the MSI Generator and click the Finish Capturing to complete the capturing process.
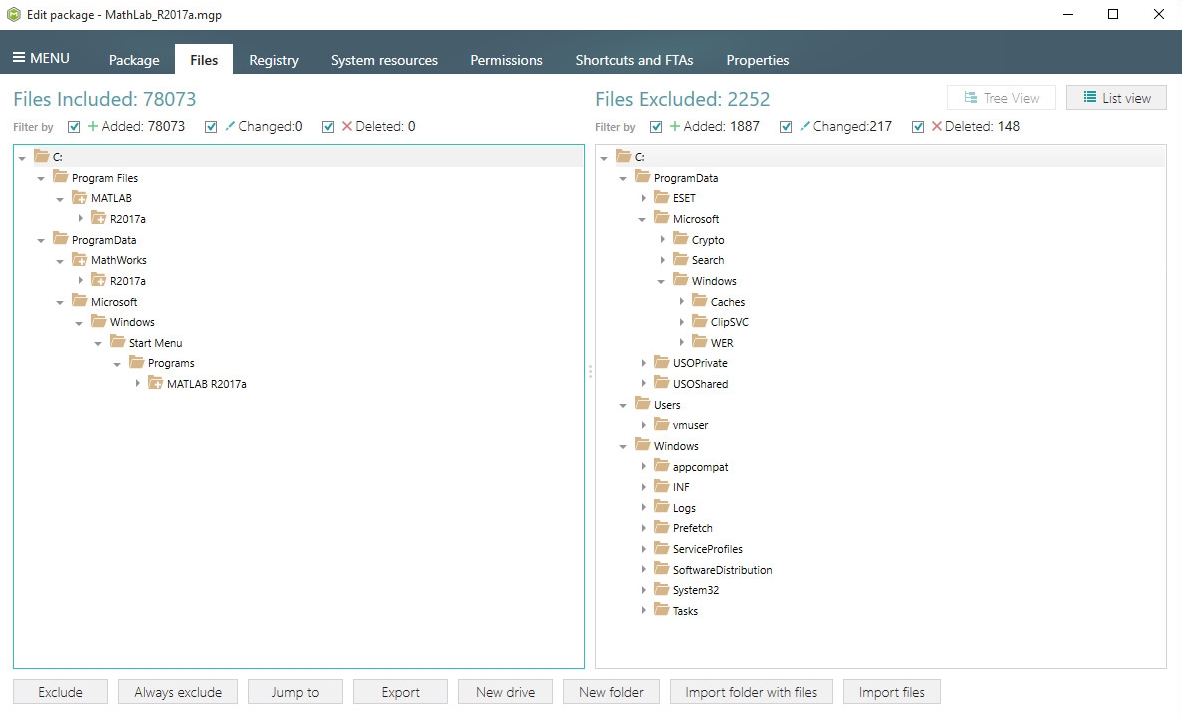
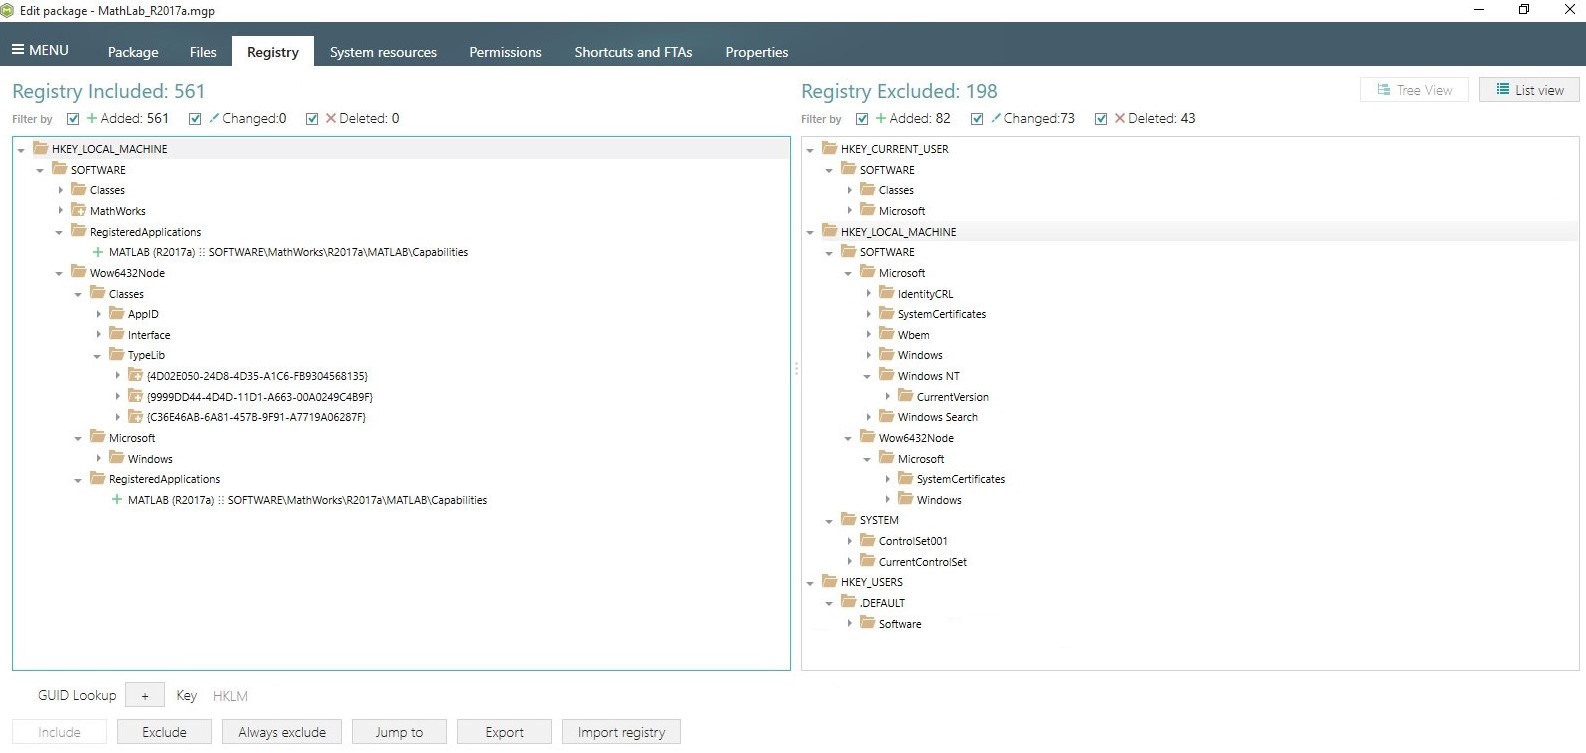
- Please wait for the capturing process to finish, filter captured data and create the project. As soon as the project has opened, go through the Files, Registry and Shortcuts tabs in order to review captured resources and exclude unnecessary ones from the project. Unnecessary resources are files, registry entries, which are usually created or modified as a result of operating system work, and such resources could not be a part of your captured application. Unfortunately, there is no universal rule to discover which of captured files or registry entries should be excluded, so exclude only those ones, which are almost 100% not related to your captured application (e.g. NOD32 antivirus files could be a part of MathLab application). Note that you can include back the excluded resources to the project.
- (optional) In order to review the captured files and exclude unnecessary ones, open the Files tab. Select Exclude from the context menu of an item, which is located in the left ‘Files Included’ pane, you want to exclude from the project.
- (optional) In order to review the captured registry entries and exclude unnecessary ones, open the Registry tab. Select Exclude from the context menu of a registry entry (which is located on the left ‘Registry Included’ pane) you want to exclude from the project.
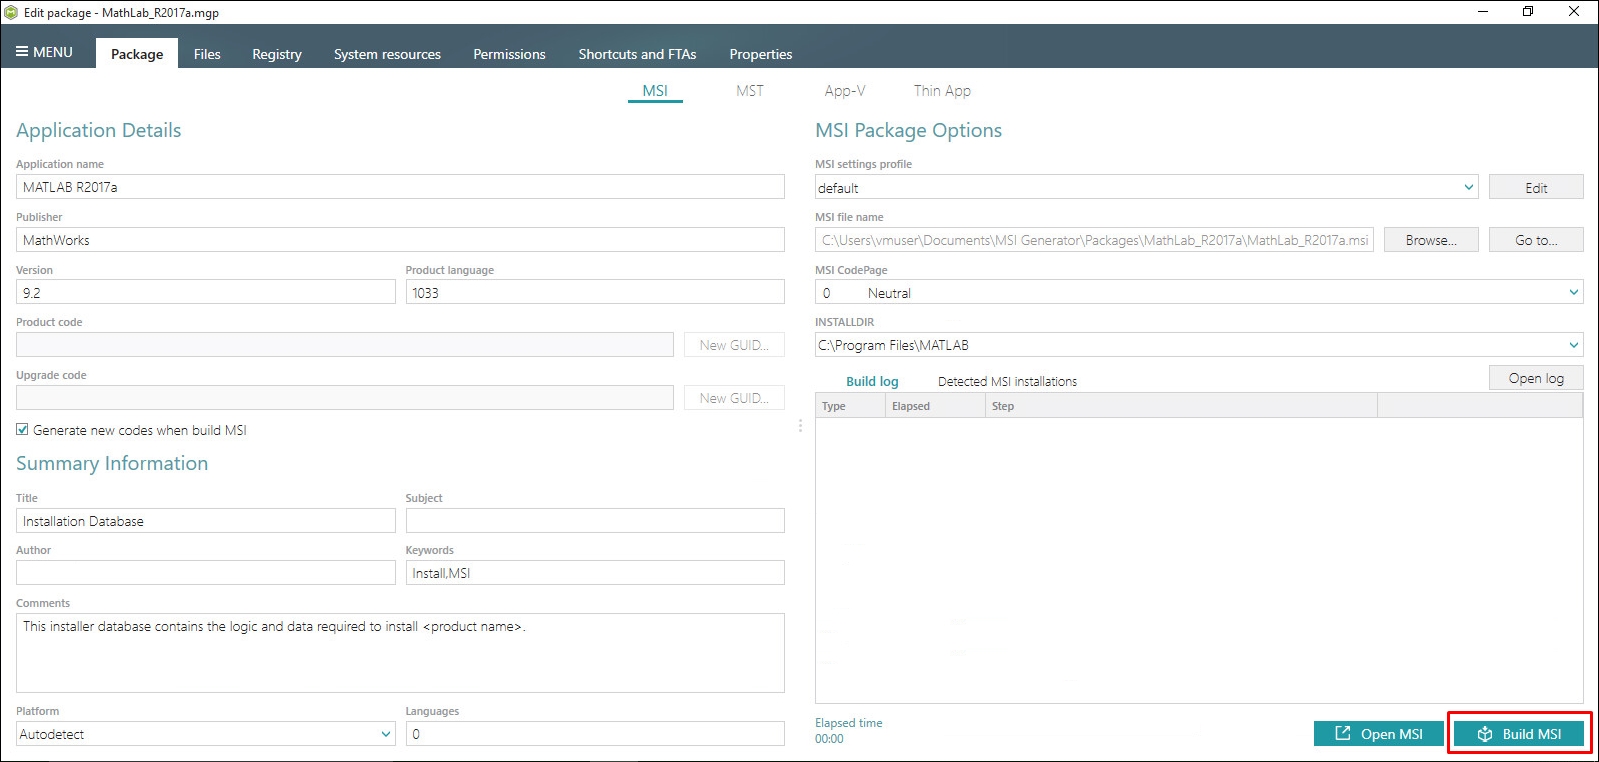
- In order to build MSI package from your project, navigate to the Package -> MSI tab, verify Application Details such as name, publisher, version, and click Build MSI.
- Click Go to…, located next to the MSI file name field, to open the package containing folder in Windows Explorer.

Comments
0 comments
Article is closed for comments.